AutoCAD SuperHatch - How to Hatch With Image Files
AutoCAD Superhatch
Superhatch is an express tools function supplied with AutoCAD (not LT but see the workaround below) that lets you quickly hatch with your own pattern, no programming or creation of pat files needed. AutoCAD hatch with image capability is a part of the superhatch function.
Instructions - Hatch with Seamless Textures
Download the image files you want to use and save on to your PC.
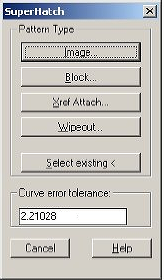
1. Type SUPERHATCH on the AutoCAD command line and pick "Image" button.
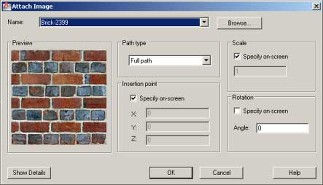
2. Browse to the image file.
3. Set Scale and Insertion point to "Select on Screen". Set Angle to zero.
4. Select insertion point within the hatch boundary pick and drag to scale image
5. AutoCAD prompts "Is the placement of this IMAGE acceptable? [Yes/No] : "
Type Y
6. AutoCAD prompts "Specify an option [Advanced options] :"
Pick a point within the hatch boundary
7. AutoCAD prompts "Use TFRAMES to toggle object frames on and off."
AutoCAD LT Superhatch Workaround (only for AutoCAD LT 2010 and later)
The hatch boundary should be a Polyline
Create a block
Use the MINSERT command to insert the block, set the rumber of rows and columns to extend beyond the area to be hatched.
use the XCLIP command, N - S and select the hatch boundary polyline
(note curves are not respected)